Google Tag Manager is a service that allows you to organize and manage common tracking and 3rd party services scripts through the Google service, then easily link them to your website.
For steps on enabling Google Tag Manager on Premium Checkout , please visit this article for instructions: Premium Checkout
Google Tag Manager can be linked using our Tags, Services & External Files block.
Google Tag Manager can be accessed at THIS LINK. Additional information on setting up Google Tag Manager is available on their TAG MANAGER HELP page.
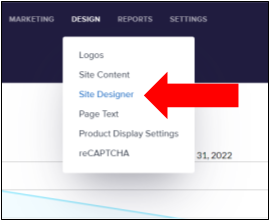
To access the block, make sure you have the Element on V1 experience active and choose Design > Site Designer from the main menu on the Admin Page.
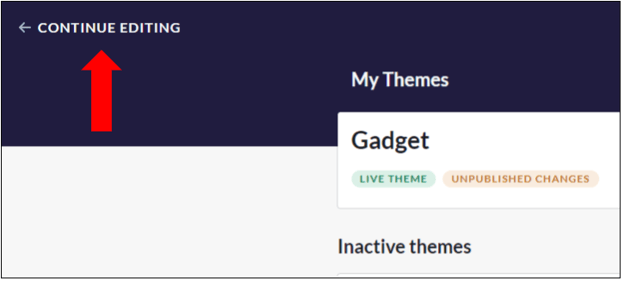
You will be directed to the Themes page. To access your Theme and add the appropriate block, click the Continue Editing link at the top left of the page.
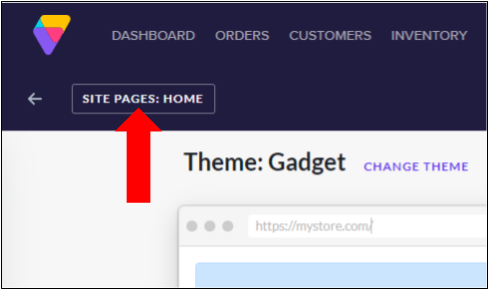
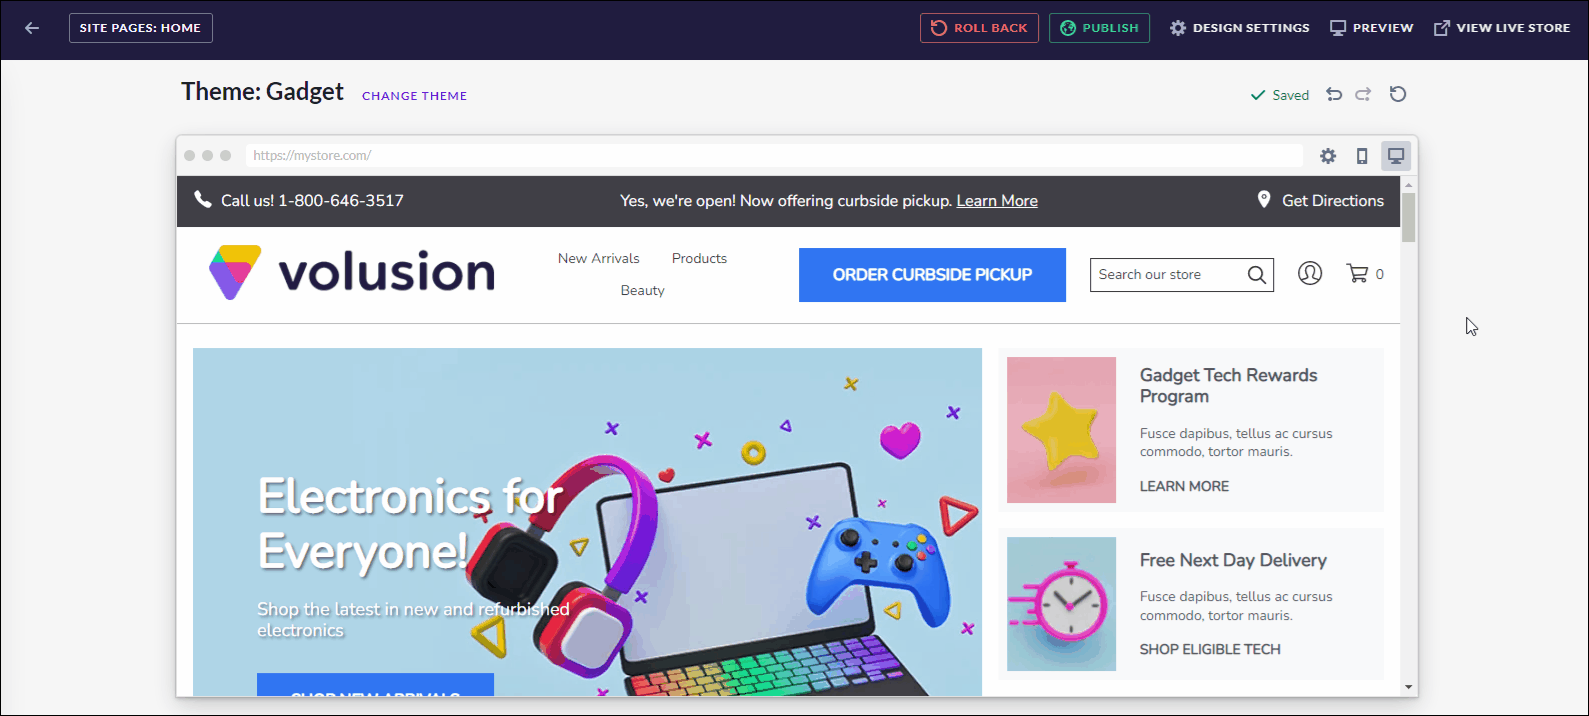
Make sure that the Site Pages drop-down menu is set to Home. This will give you access to the Homepage of your website.
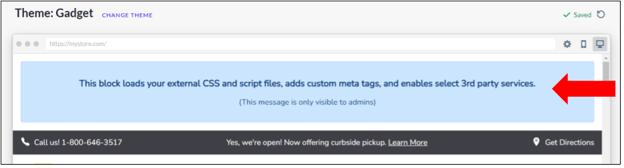
In most cases, your homepage will already feature the Tags, Services and External Scripts block. The block will appear at the top of your website page.
In the event that the block is not visible on your homepage, it can be added by locating the topmost Add button (purple circle with a plus sign) on your site. You can do this by mousing over the page until the button is located. Click it to access the Add A Block menu.

Scroll down the menu and locate the Reusable Components section. Click this section to open it. Scroll down and locate the Tags, Services & External Files block. Click the blue Add Block button to add the block to your homepage.
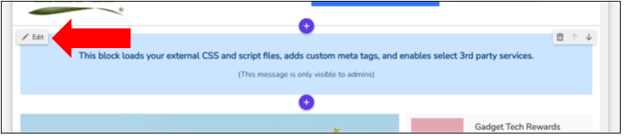
Once you have added the block to your website, mouse over the block and locate the gray Edit link that appears in the top left of the block. Click this link to edit the block.
Google Tag Manager will be the last section in the Edit Block menu. Click on the section to open it.
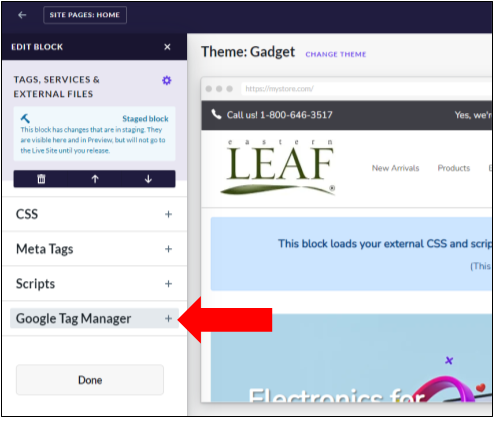
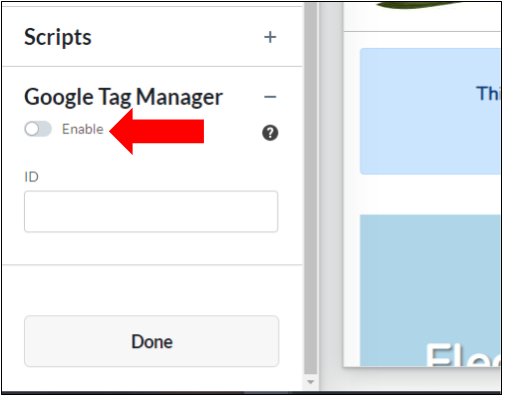
Google Tag Manager must be enabled on your site using the Enable slider.
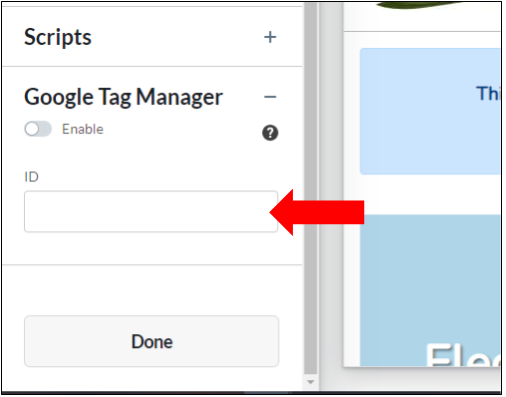
In the ID field, you will enter your Google Tag Manager Container ID, as assigned by Google once you set up your Tag Manager. This will allow you to load common tracking or 3rd party services scripts to your site.
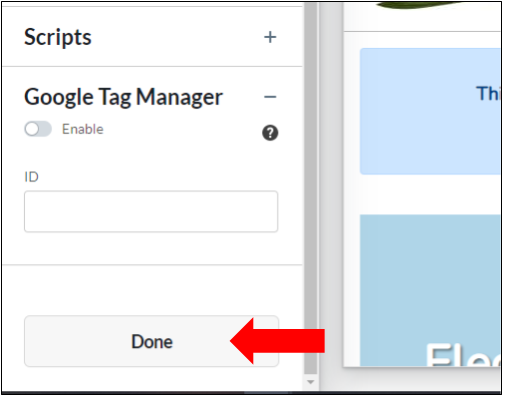
Click the Done button to save your changes.
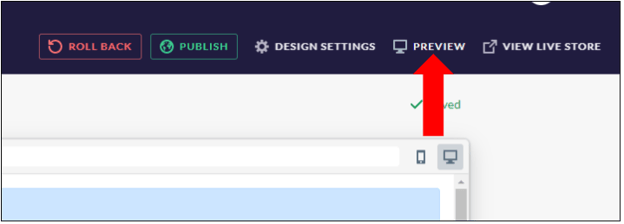
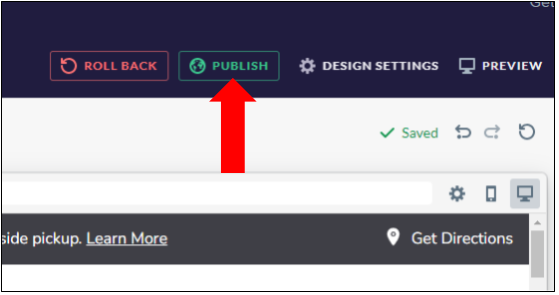
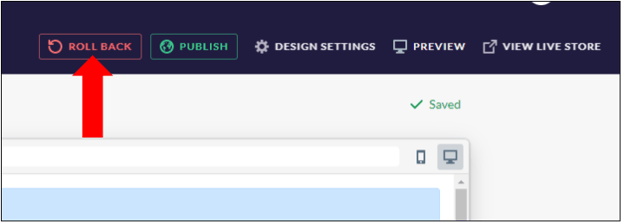
As a final step to making your changes live on your website, you must click the green Publish button at the top of the Theme page. Keep in mind, this will make your Theme visible to anyone visiting your website, so if you are still making changes, you can wait to publish your site until you are 100% ready.
Publishing for the first time will launch your Element site. This process can take roughly 10 minutes and can be rolled back using the Roll Back button in the event you wish to do more work or make changes before going live. Rolling back before publishing for the first time rolls back the V1 admin navigation menus (themes, style editor, etc.) and the change is immediate. This is useful for working on the Element theme Site Designer and then switching back to making changes on the V1 theme prior to publishing the Element theme for the first time.
Alternatively, the Preview button can be used to view the site as it will look when published, without actually publishing. This allows you to view your changes to the Element site, prior to going live.