---
title: Option Categories & Options
description: Your customers can use options to customize the products they buy. Examples of options are small, large, red, and blue.
---
[Skip to content](https://help.volusion.com/s/optioncategoriesoptions#main-content)
English - United States
Show submenu for translations

Open main navigation
Close main navigation
- English - United States
Show submenu for translations
- [Contact Us](https://volusion.com/contact)
[Contact Us](https://volusion.com/contact)
Search the Help Center
- There are no suggestions because the search field is empty.
1. [Volusion Help Center](https://help.volusion.com/s?hsLang=en-us)
2. [V1](https://help.volusion.com/s/v1?hsLang=en-us)
# Option Categories & Options
Options are displayed on your product page. Your customers can use options to customize the products they buy. Examples of options are small, large, red, and blue.
Option Categories group similar options together. Examples of option categories are Size and Color.
Creating Options
In this example, we'll create an option category for colors, then create options for color choices.
### Create an Option Category
Go to **Inventory** \> **Options** in your store's Admin Dashboard page.
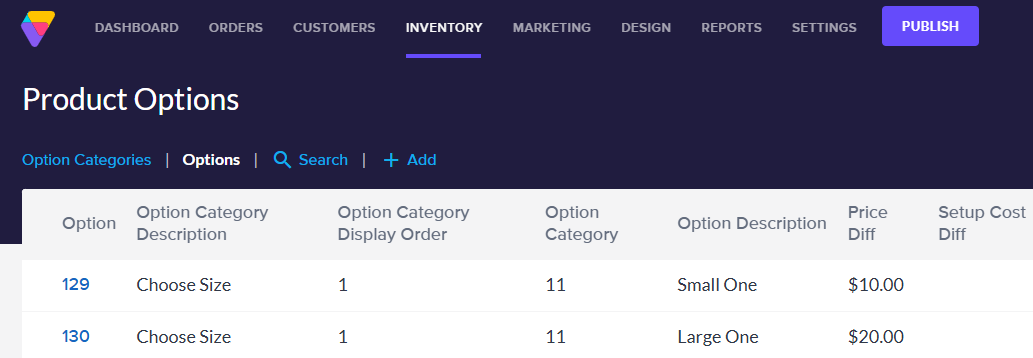
Select **Option Categories** from the Filter dropdown at the top left of the Product Options page.
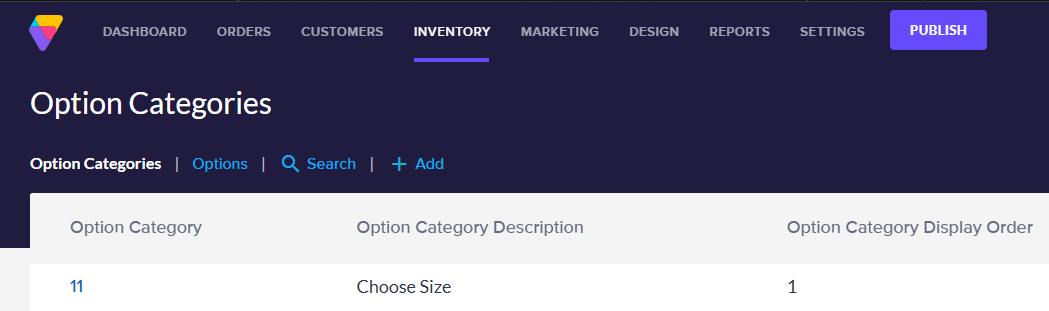
Click the **Add** button at the top left of the page.
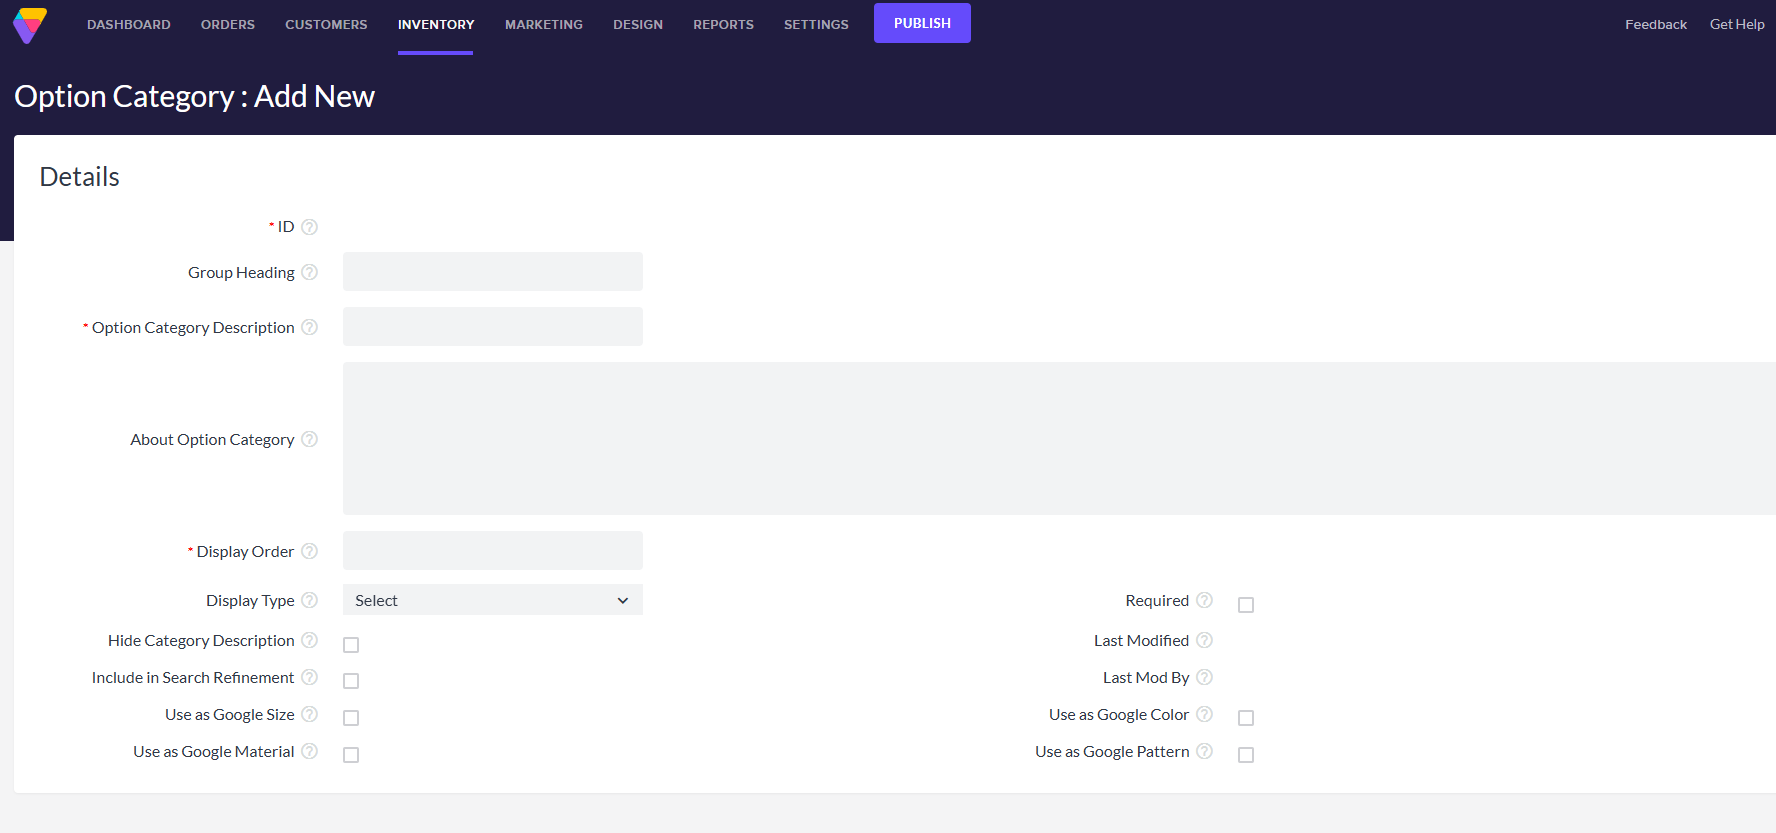
The **Option Category ID** will populate automatically when you Save the Option Category. The **Group Heading** field is optional. This value can be helpful if you would like to label option categories by the types of products they apply to. For instance, the Option Category Sizes might have a Group Heading of Shoe Sizes to clarify. For this example, enter **Color** in the Option Category Description field.
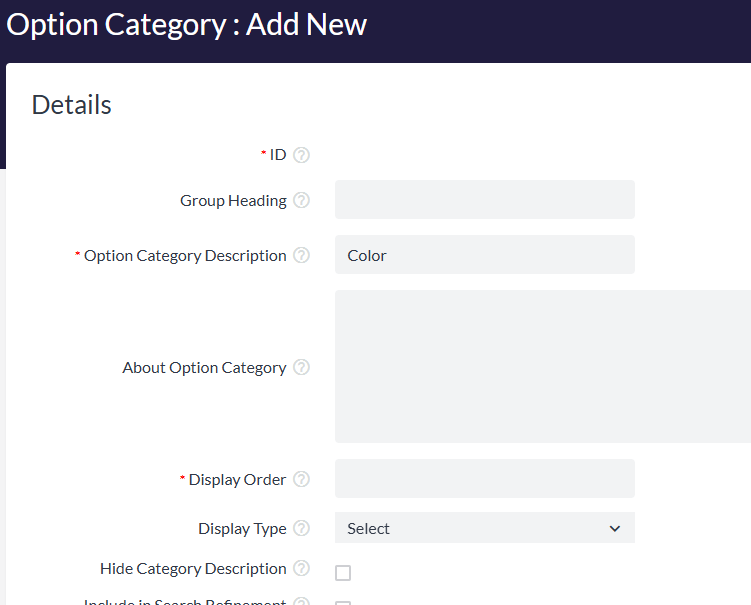
The **About Option Category** field allows you to add a simple description for the Option Category. When populated this appears as a clickable tooltip beside the Option Category Description on the Product Page. Enter a number in the **Display Order** field field to assign its storefront display position. The lower the number, the higher it displays on the product page relative to other option categories assigned to the same product. In this example, enter **100** in the Display Order field. It is a good idea to leave a gap between display numbers, in the event you want to add more Option Categories later.
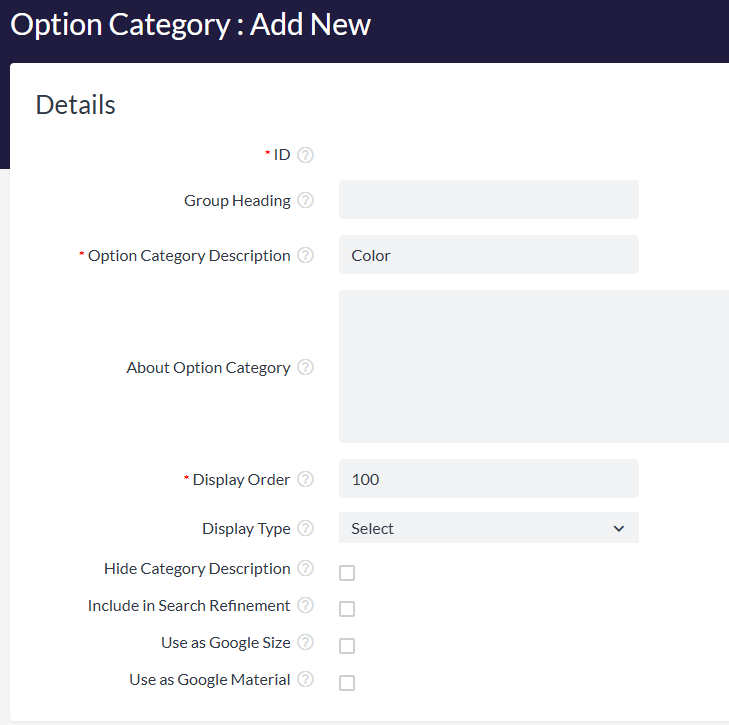
Choose a Display Type using the dropdown menu. The selections are:
- **Dropdown** (display options as a drop-down menu).
- **Checkbox** (should only be used if there is a single option; for example, a yes/no or opt-in question).
- **Radio** (shows a list of options, each prefixed with a radio button).
- **Textbox \*\*** (If your product requires that the customer supply custom text, you can use this to provide a text box for this.)
- **Dropdown Control** (this option is for older clients; it has been replaced by **Dropdown\_Smartmatch** and should not be used).
- **Dropdown Client** (this option is for older clients; it has been replaced by **Dropdown\_Smartmatch** and should not be used).
- **Dropdown Smartmatch** (use with inventory control to hide option combinations where the corresponding product is out of stock).
- **Plain Text** (shows all product options within the category as a simple line of text).
In our example, select **Dropdown** from the Display Type dropdown menu.
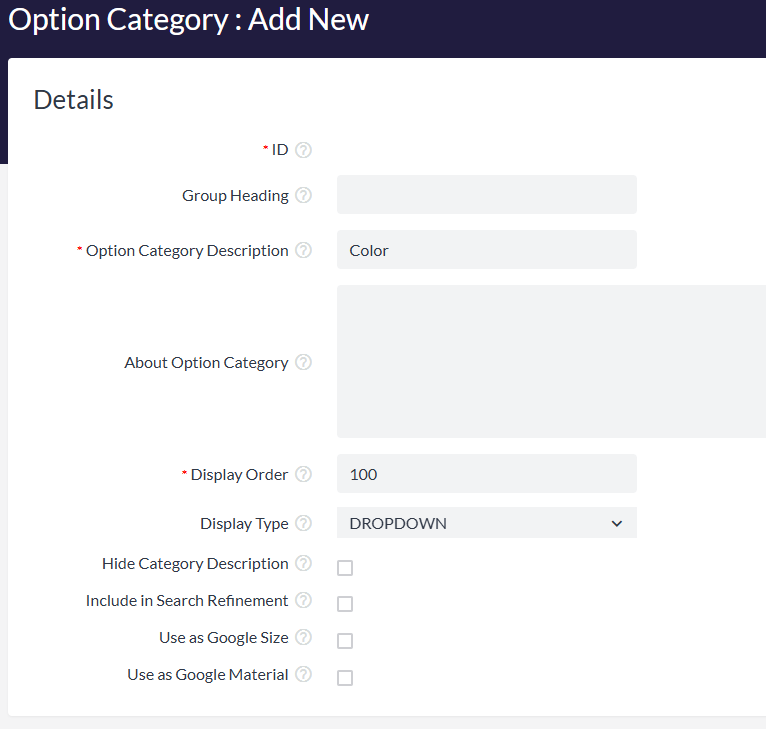
Enable the **Required** checkbox if an option *must* be selected for a customer to be able to purchase a product. For instance, if you are creating a Size or Color Option Category and want to force customers to make a choice, rather than leave the option blanks, you will want to activate the Required field. Check the box next to **Required** to activate it.
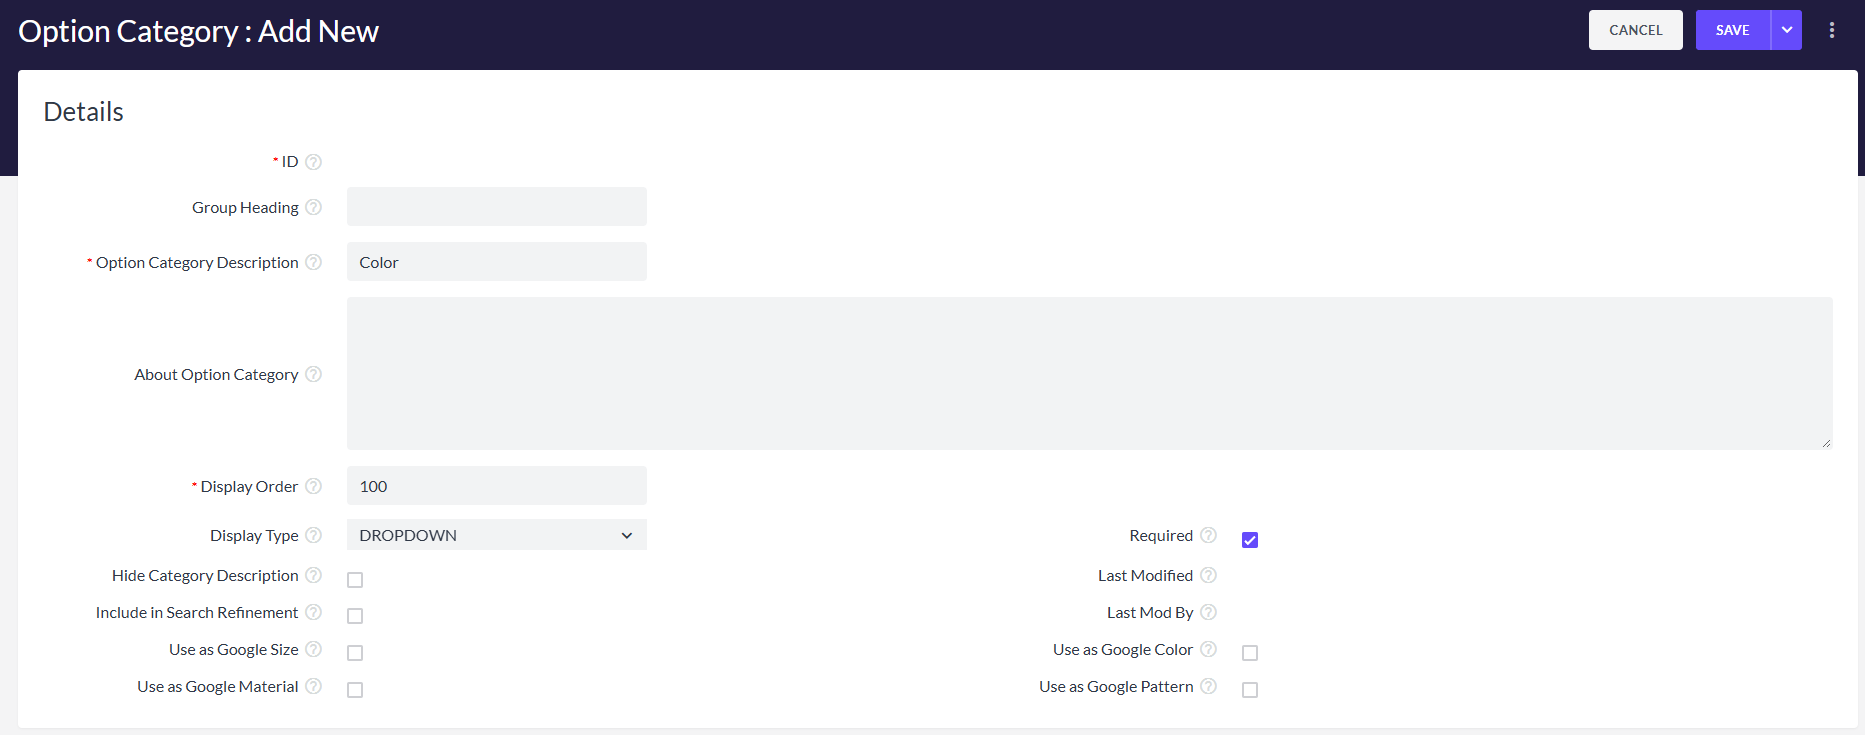
The next 2 settings are optional. The **Hide Category Description** hides any text entered in the Option Category Description field from customers. The **Include in Search Refinement** field includes this category as a [search refinement](https://help.volusion.com/s/HowtoUseSearchRefinement?hsLang=en-us) option. The Last Modified Date and Last Modified by (Admin Account Number) are also listed in this section.
The final section includes option for using the Option Category for Google Attributes.
- **Use as Google Size** (use the options in this category as the **Google Size** attributes for child products).
- **Use as Google Color** (use the options in this category as the **Google Color** attributes for child products).
- **Use as Google Material** (use the options in this category as the **Google Material** attributes for child products).
- **Use as Google Pattern** (use the options in this category as the **Google Pattern** attributes for child products).
Once you have completed setup of your Option Category, click the **Save** button at the top right of the page.
After creating your option categories, you can create options.
### Create Options
Go to **Inventory** \> **Options** in your store's Admin Dashboard page.

Click the **Add** button at the top left of the page.
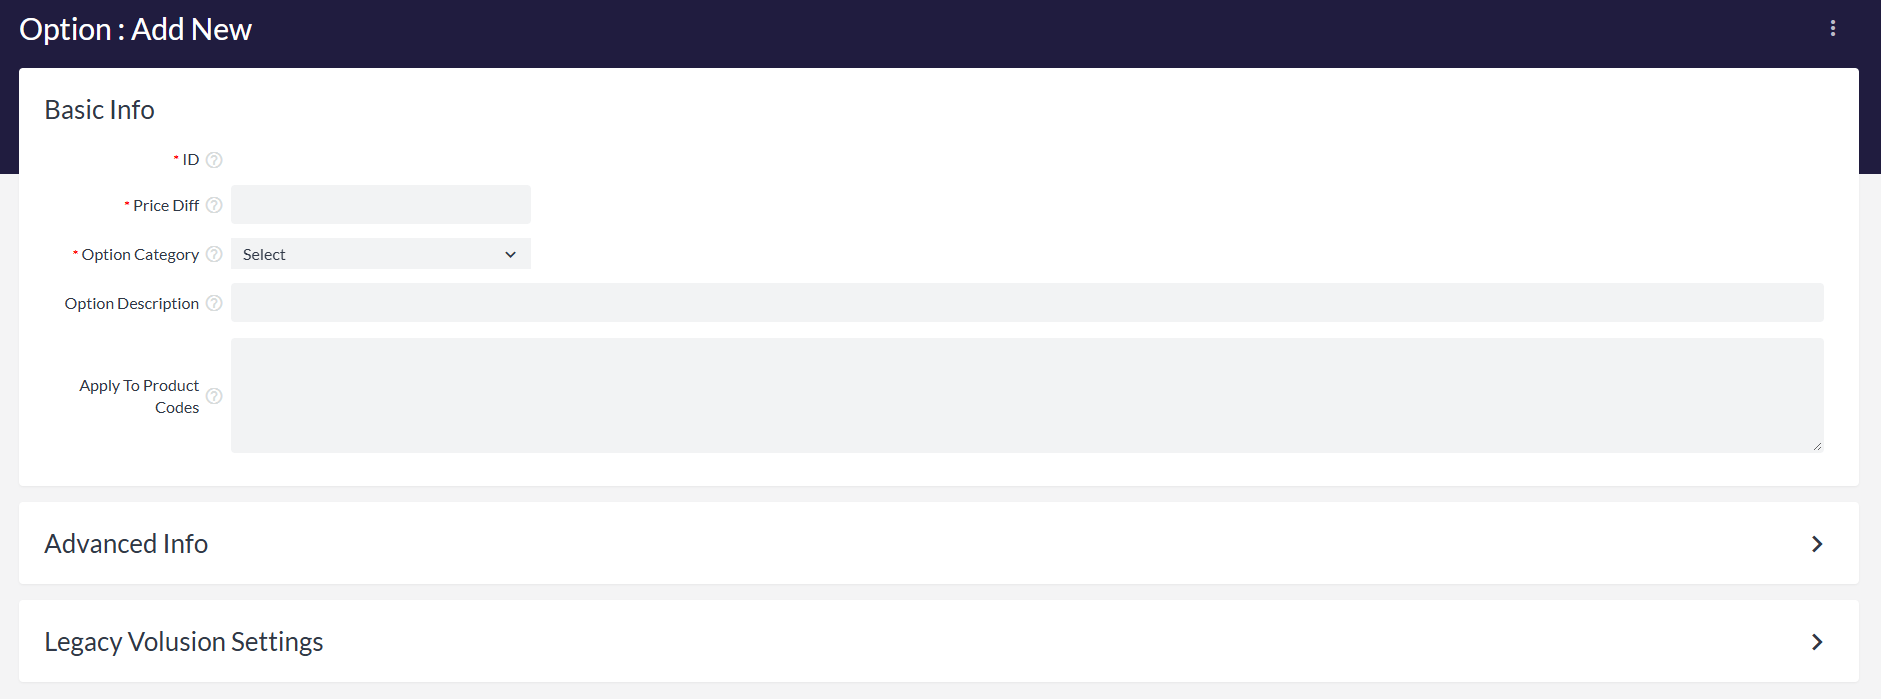
The **Option ID** will populate automatically when you save the Option. Enter an additional cost for the option in the **Price Diff** field. This can be helpful when dealing with Options such as sizes where they may be a price difference between 2 options. As an example, a Large size option may have a zero Price Diff, but Extra-Large may have a Price Diff of 1.00, which ensures that choosing the Extra-Large option will charge a dollar more to your customers. For an option without an additional cost, enter **0.**
Select our previously created Option Category (**Color)** from the Option Category dropdown.
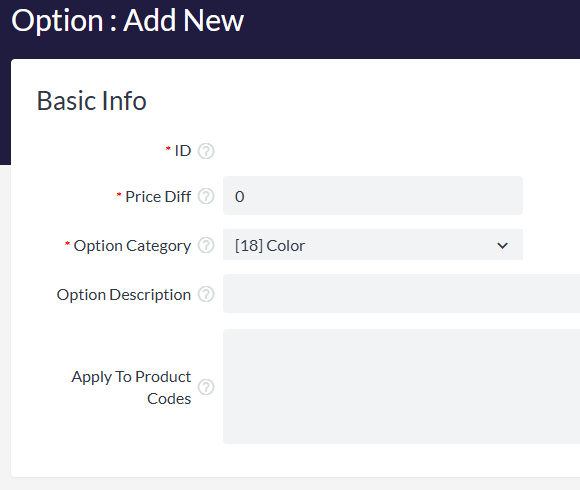
Enter **Red** (or your Option choice) as the Option Description. This is what the customer will see on your Product Page that will help them make their option choice.
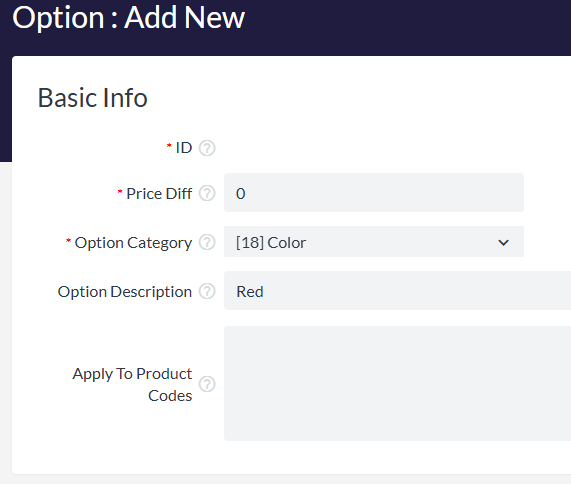
Your option can be added to a product at a later point via the Product Update Page, however, if you already know the Product Codes to which the option will apply, you can add them, separated by commas in the **Apply To Product Codes** field.
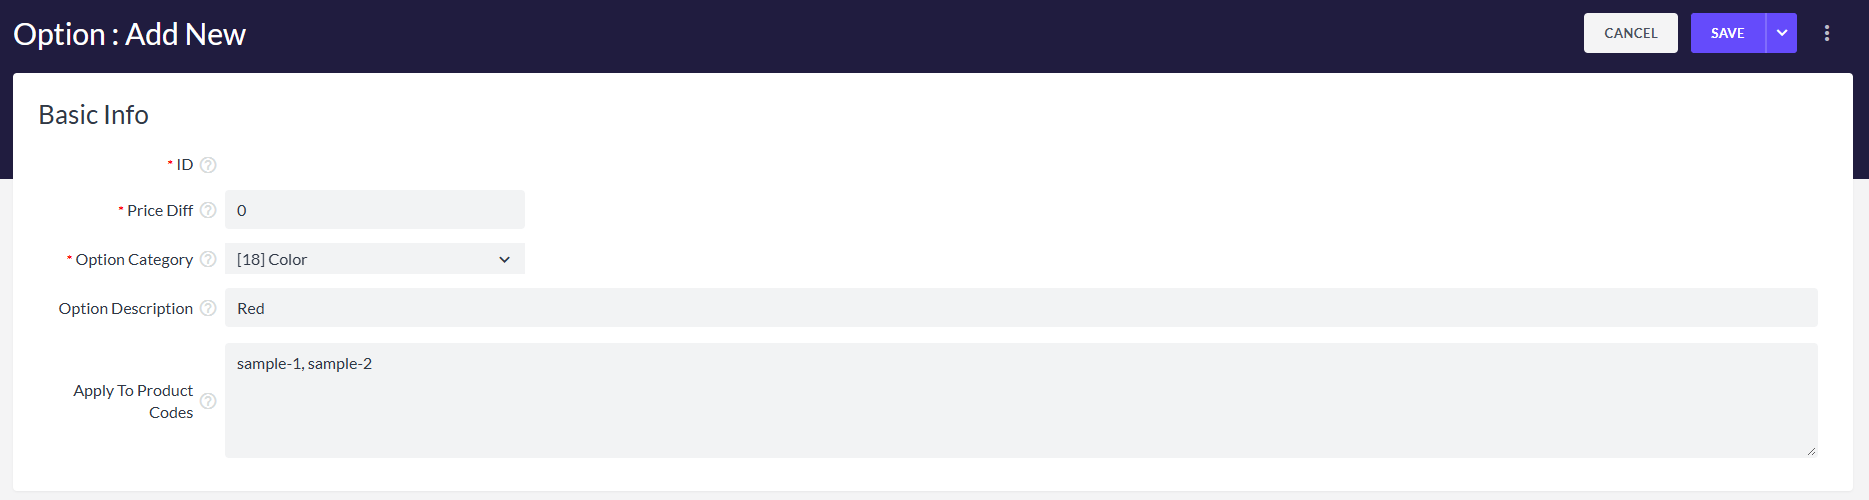
Click the **Save** button at the top right of the Option page.
### Importing Options to Product Database
Be aware that you can import the **OptionIDs** field to the Products table, but you *cannot* import the **Apply to Product Codes** field on the Options table. This means you must update the Products table to import any mass of options and use the **Create All Inventory Control Grids** maintenance function.
When importing the OptionIDs field in a CSV file, be careful that Excel (or any other CSV editing program) does not format your list of Option ID numbers as a very large number (larger than 3 digits). If this happens, you should change the data type for the column in Excel to Text. That way, Excel will not attempt to change the formatting of your listed option ID numbers, and you can avoid error messages when you try to import the file into your Volusion products database.
### Update Price Button
The **Update Price** button will appear on the storefront product page when a PriceDiff is configured for an option that is applied to the product. Once a customer selects one or more options with a PriceDiff configured, manually clicking the **Update Price** button will reveal the new price of the product.
Alternatively, you can have the product price update automatically when a customer selects an applied option with a PriceDiff. For more information, see our article on [price display for product options](https://help.volusion.com/s/HowtoUpdatethePriceDisplayforProductOptions?hsLang=en-us) .
### Brush Up on Your Inventory Controls
Before you create an [Inventory Control Grid](https://help.volusion.com/s/HowtoUsetheInventoryControlGrid?hsLang=en-us) , you should have a strong understanding of product option categories and options. Read more about these in our Knowledge Base.
### Tips and Special Settings
### Using the Search Refinement Function
Filter categories allow you to add drop-down menu options on your stores search results, making it easier for shoppers to find what theyre looking for.
1. At **Settings** \> **Config Variables**, make sure the **Enable Search Refinement** check box is selected.
2. Go to **Inventory** \> **Options**.
3. From the **Filter** menu, select **Option Categories**.
4. Press **Add**.
5. Fill out the fields as necessary.
6. Select **Include In Search Refinement** check box.
7. Save.
8. Go to **Settings** \> **Maintenance.**
9. Click **Rebuild Search Index**.
The product option category will now appear as a filter category whenever a customer performs a search and its results include products associated with this option category.
### Offering Multiple Checkbox Options
Option Categories that use the **Checkbox** display type are intended for offering a single option with a yes/no response. For example, a customer can select a check box to add a warranty (a "yes" response) or leave it unchecked if they don't want a warranty (a "no" response).
If you need to display multiple check box options for a single product, each option must be assigned to its own Option Category. For example, if you'd like to display check boxes for two optional accessories on a product, you can create the two "accessory" product options and assign them to two separate Option Categories that use the **Checkbox** display type.
### Setting Up A Free Gifts Option
If you want to set up a "Buy One, Get One Free" or "Buy X, Get Y Free" offer to attract more sales or quickly move inventory:
1. Create products as usual. Make sure you note which products will be offered for free.
2. Go to **Inventory** \> **Options**.
3. From the **Filter** menu, select **Option Categories**.
4. Click **Add** to create the option category.
5. In the **Option Category Description** field, enter a description for the free product(s).
6. Select the **Is Required** check box.
7. From the **Display Type** menu, select **Dropdown**, **Dropdown Smartmatch**, or **Radio**.
8. Click **Save*.***
9. Return to **Inventory** \> **Options**.
10. Click **Add** to set up a new product option.
11. Set the **Price Diff** value to zero.
12. From the **Option Category** menu, select the name of the option category you created above.
13. In the **Options Description** field, enter the free item's name. You can give it a name like "Free earphones," or something more specific.
14. In the **Is Product Code** field, enter the product **Code** for the free item.
15. Click **Save**.
Repeat this process to set up additional free products.
- [Getting started](https://help.volusion.com/s/getting-started?hsLang=en-us)
- [Manage Your Store](https://help.volusion.com/s/manage-your-store?hsLang=en-us)
- [Marketing for Success](https://help.volusion.com/s/marketing-for-success?hsLang=en-us)
- [Volusion Payment Powered by Stripe](https://help.volusion.com/s/volusion-payment-powered-by-stripe?hsLang=en-us)
- [Partner Marketplace](https://help.volusion.com/s/partner-marketplace?hsLang=en-us)
- [Support](https://help.volusion.com/s/support?hsLang=en-us)
- [V1](https://help.volusion.com/s/v1?hsLang=en-us)
- [Security](https://help.volusion.com/s/security?hsLang=en-us)
[](https://volusion.com/)
[mailto:email@email.com](mailto:email@email.com)
Copyright © 2026, Volusion